Making Blood Agar Culture Media: A Step-by-Step Guide
Blood agar is a rich, differential medium used extensively in microbiology to cultivate a wide variety of organisms and differentiate them based on their hemolytic properties. The medium contains general nutrients and 5% sheep blood, which provides the enrichment necessary for the growth of fastidious organisms and allows for the detection of hemolysis.
Ingredients
1. Tryptic Soy Agar (TSA) or Nutrient Agar Base
– 40 grams per liter (g/L)
2. Sheep Blood
– 5% of the total volume (50 mL for every 1 L of medium)
3. Distilled Water
– 1 liter
Equipment
1. Autoclave: For sterilizing the agar base.
2. Water Bath: To cool the agar base before adding blood.
3. Sterile Petri Dishes: For pouring the medium.
4. Pipettes or Sterile Graduated Cylinders: For measuring blood.
5. Bunsen Burner or Alcohol Lamp: For maintaining sterile conditions while pouring plates.
6. Stirring Rod: For mixing.
Procedure
1. Preparation of Agar Base:
– Measure 40 g of Tryptic Soy Agar (TSA) or Nutrient Agar base powder.
– Dissolve the agar base powder in 1 liter of distilled water in a heat-resistant container.
– Heat the mixture until it boils, ensuring the powder is completely dissolved.
2. Sterilization:
– Autoclave the agar base at 121°C for 15 minutes to sterilize.
3. Cooling:
– After autoclaving, allow the agar base to cool in a water bath to about 45-50°C. This is crucial because adding blood to hot agar will cause hemolysis, and cooling it too much will cause the agar to solidify prematurely.
4. Addition of Blood:
– Using aseptic technique, add 50 mL of sterile, defibrinated sheep blood to the cooled agar base.
– Mix gently but thoroughly to avoid bubble formation and ensure even distribution of blood throughout the medium.
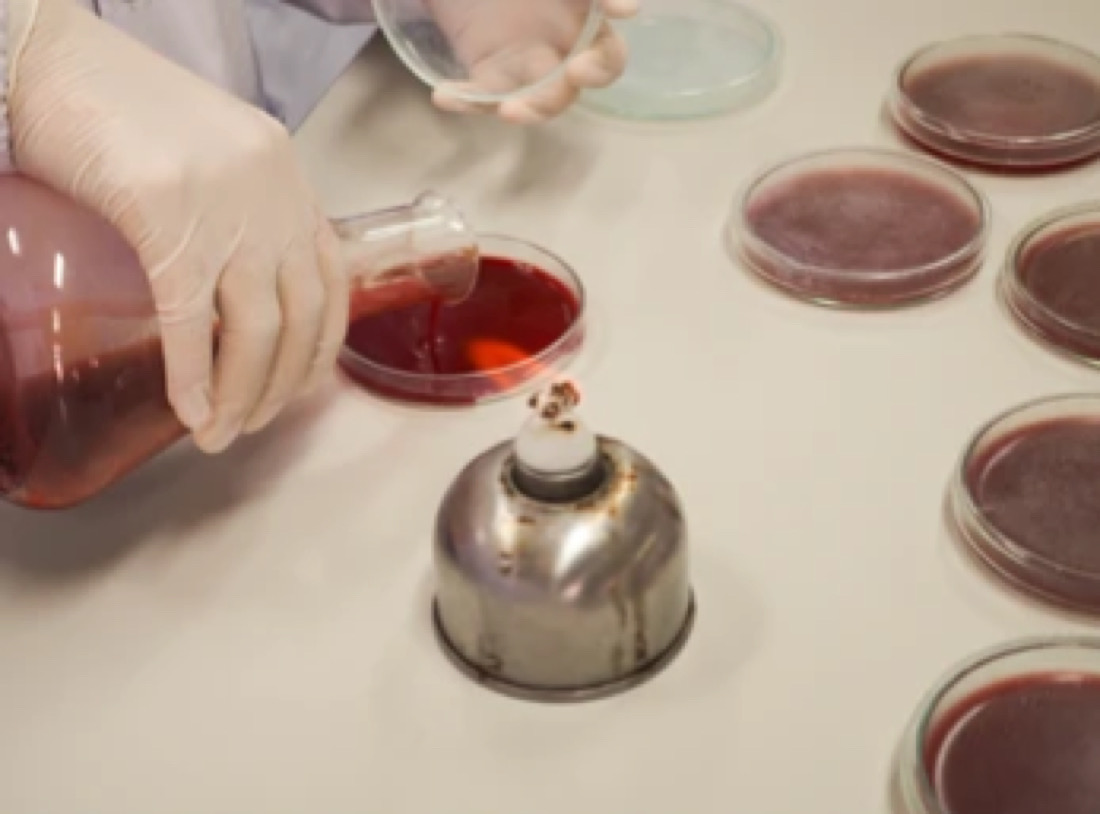
5. Pouring Plates:
– Using sterile techniques, pour the blood agar mixture into sterile Petri dishes. Pour enough to cover the bottom of each dish, usually about 15-20 mL per plate.
– Allow the plates to solidify at room temperature.
6. Storage:
– Once solidified, store the plates in a refrigerator at 2-8°C if not used immediately. Properly stored plates can last up to several weeks.
Quality Control
1. Sterility Check:
– Incubate one plate at 37°C for 24-48 hours to check for contamination.
2. Hemolysis Testing:
– Inoculate plates with known hemolytic and non-hemolytic bacteria to ensure the blood agar’s performance. Observe for beta-hemolysis (clear zones), alpha-hemolysis (greenish zones), and gamma-hemolysis (no hemolysis).
Applications
Blood agar is particularly useful in clinical microbiology laboratories for the isolation and identification of pathogenic bacteria. It is used to grow fastidious organisms such as streptococci, which require a rich medium. The ability to distinguish between different types of hemolysis helps in the identification and differentiation of bacterial species.
Safety and Waste Disposal
– Always use aseptic techniques to avoid contamination.
– Wear personal protective equipment (PPE), including gloves and lab coat.
– Dispose of any used or contaminated materials following biosafety protocols.
By following these steps, you can successfully prepare blood agar plates that are essential for various microbiological applications, ensuring reliable and accurate results in microbial analysis.
NewsLetter: